How to create a scenario based on your road network
In SCANeR, every test case has to be created as a Scenario. Each Scenario takes place on a specific Terrain and involves different Actors. In this section, you will create your first Scenario.
- Step 1. Create the scenario
- Step 2. Populate the scenario
Step 1. Create the scenario
-
Create a new
Scenarioby clicking onFile\New Scenarioin SCANeRSCENARIOmode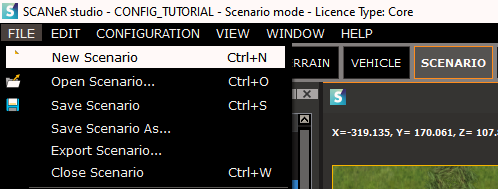
-
Select the
Terrainon which you want yourScenarioto take place. In my case, I’m choosing theTerrainI created in the previous step.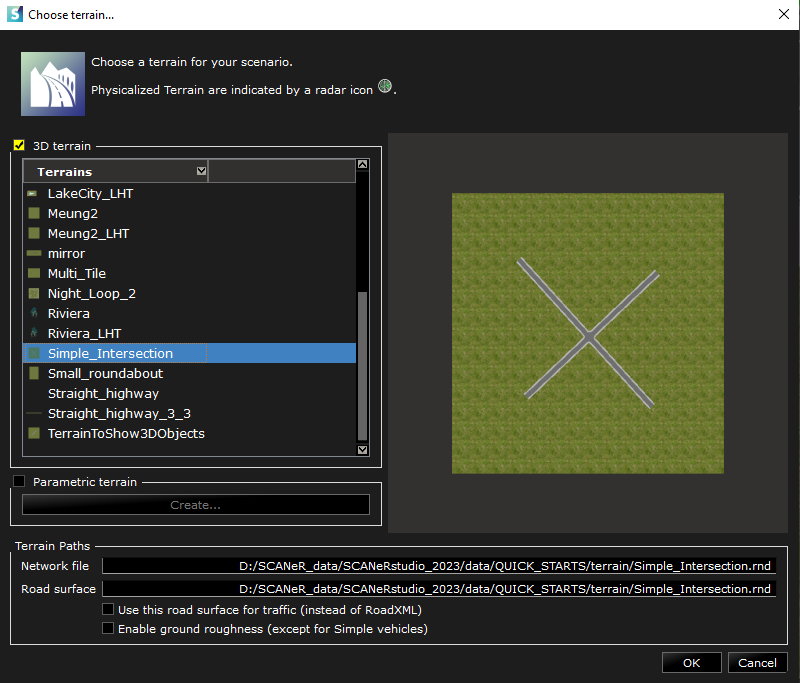
Don’t worry, you can always change the
Terrainby right clicking onGroundin the parameters and clicking onChange Terrain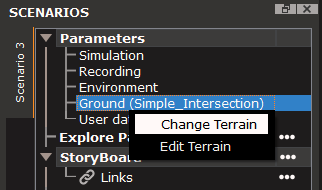
Step 2. Populate your scenario with actors
-
Choose the EGO vehicle of your scenario. This will be the vehicle on which the
VISUALmodule will be focused. Once you have chosen, you can simply drag and drop the vehicle from the resources to the terrain at the location you want.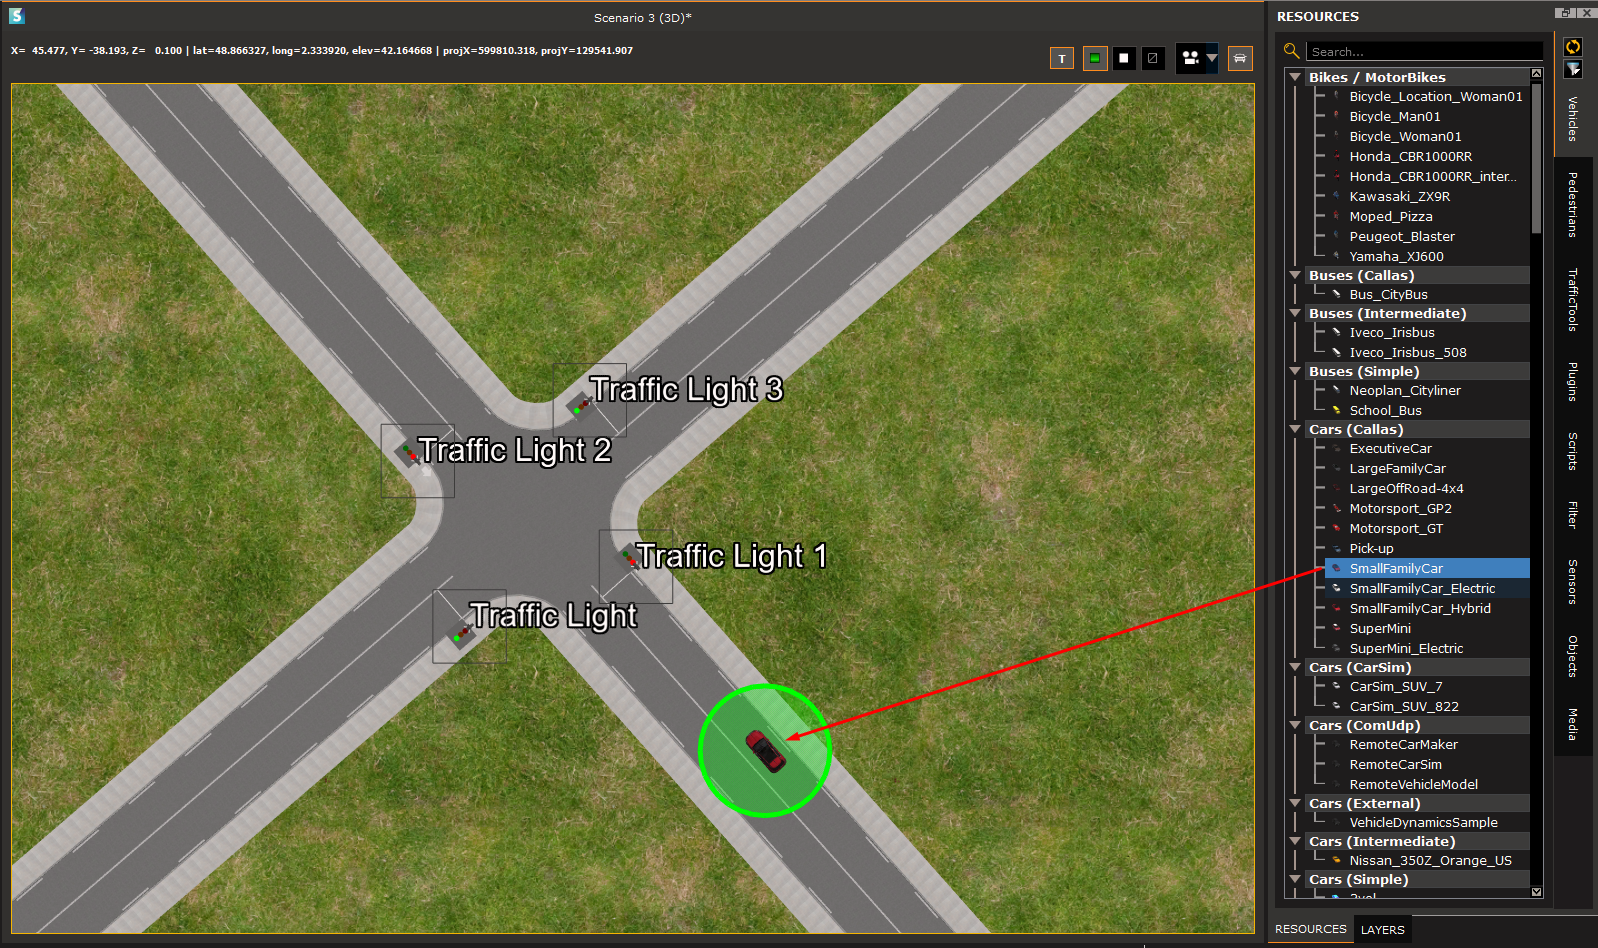
The type of vehicle here is a CALLAS vehicle. This is a vehicle that has a full vehicle dynamics. There are other types of vehicles, and they are all in the resources.
-
Add other actors to your scenario. You can add Cars, Pedestrians, Trucks, Buses, Motorcycles, and many more. Here is the result I get with my
Scenario:
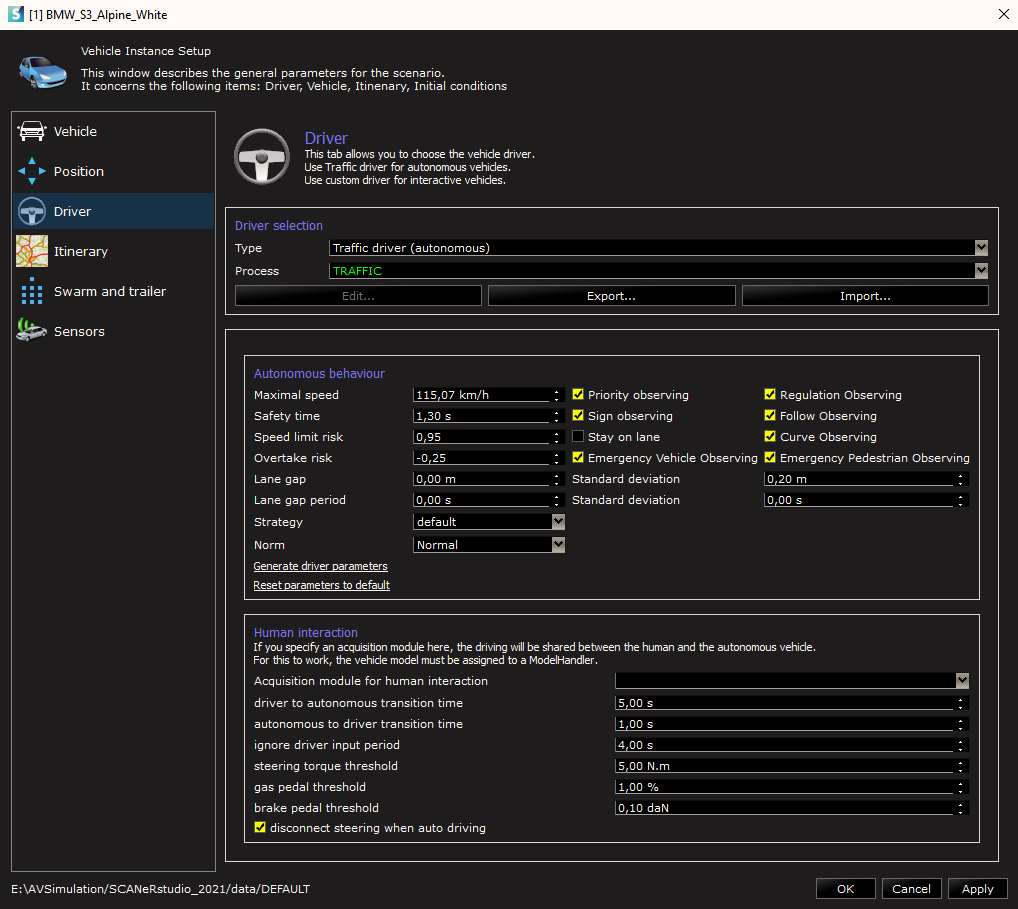
If a vehicle’s behavior does not correspond to what you need, you can always edit the instance in your
Scenario, by right clicking on the vehicle in the scenario inspector, and choosingEdit instance.... You can then change every parameter for this vehicle’s instance.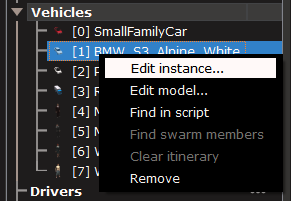
Congratulations! You have created your first Scenario 👍
Try to execute it by following our tutorial : Run a simulation