How to define and record my KPI
In this guide we will see how to define and record a Key Performance Indicator (KPI). The KPI we will analyze for this example is the driver’s reaction time to brake when a pedestrian crosses the road. To do this, we will follow some simple steps. We will first see how to define the KPI in the SCENARIO mode, record the SIMULATION, and then analyze it using the ANALYSIS mode.
- Step 1. Setup your scenario
- Step 2. Record your simulation
- Step 3. Access KPI data
Step 1. Setup your scenario
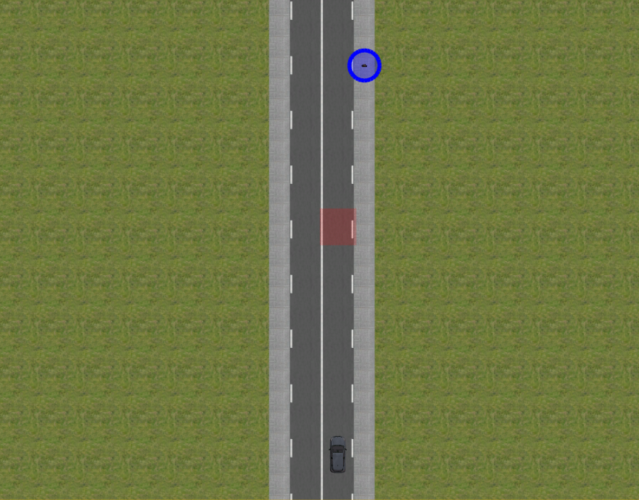
In order to measure the driver’s reaction time to brake when a pedestrian crosses the road, we need a scenario with a vehicle, a trigger and a pedestrian (Inactive) on the same road. The pedestrian must cross when the vehicle arrives.
We will not explain here how to do it but here are the screenshots of the Top view and the script for this scenario.
Define your KPI:
To define your KPI in order to be accessible in the ANALYSIS mode, you need to send the information you want through an exportChannel.
Note: An export channel is a range of open channels on SCANeR simulation bus for end-users to easily exchange custom I/O with SCANeR environments.
To do so, you need to create a script:
- Click on the three white dots on the right of
StoryBoardinSCENARIOSdock. - Add a
Step. - Then add a
Mice Script.
Note: You can use a Python Script as well. All the documentation is available in the SCANeR studio documentation, part 2.20. PYTHON API.
Once inside your new script, you will need to calculate the time between the moment when the driver brakes and the pedestrian crosses and send it to an exportChannel.
For this:
-
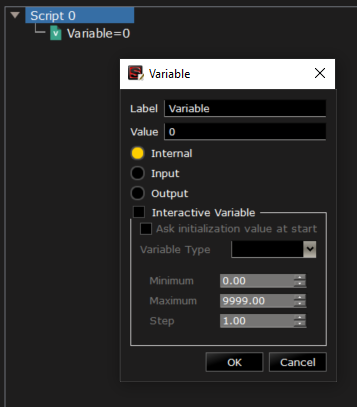
Right click on
Scriptand insert aVariable.
-
Add a second
Variable.These variables will be your time markers for the beginning of the vehicle braking and the beginning of the pedestrian movement. You can call them
t1andt2for example. -
Then right click on
Scriptagain and insert a rule. -
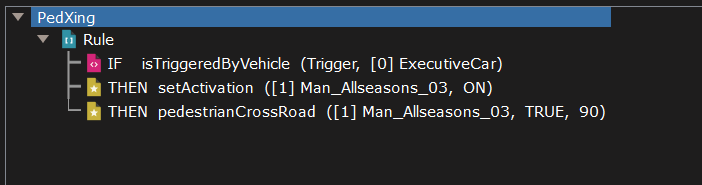
With a right click on this rule, add a
isPedestrianCrossingcondition (Type:BECOMES TRUE).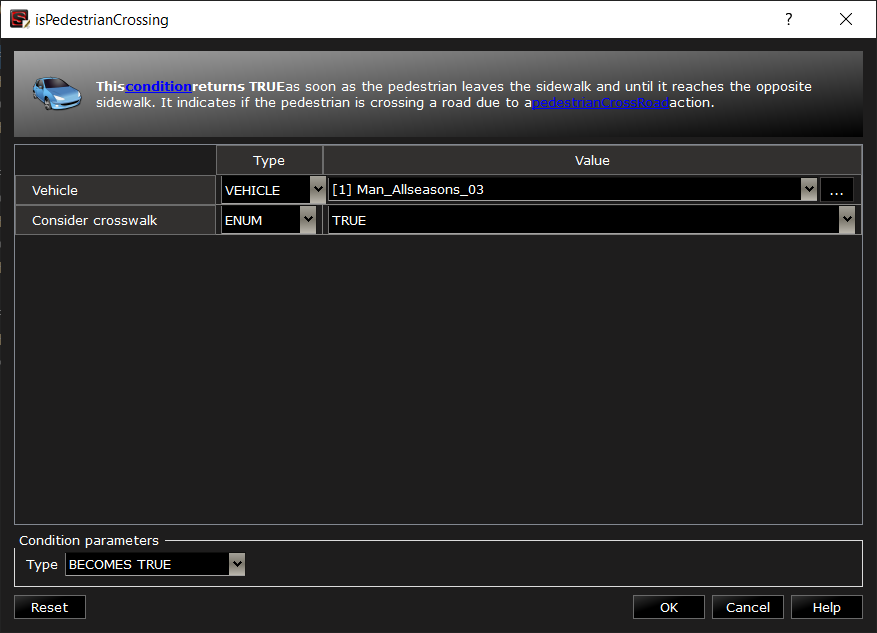
This condition returns TRUE as soon as the pedestrian leaves the sidewalk and until it reaches the opposite sidewalk. It indicates if the pedestrian is crossing a road due to a
pedestrianCrossRoadaction.Note: All the conditions, actions and functions are described in the Scripting Help.
-
Once the condition is created, insert a THEN action in the rule. This THEN action will use the function
setVariableto give a value to one of your variable.
In this case, use the function
getScenarioClockto give a value to the variable. It returns the time elapsed from scenario starting, in seconds. (Precision is about 10e-7.) -
Add another THEN action to the rule to have a time marker without using a variable. That will help in the
ANALYSISmode to know exactly when the action occurred.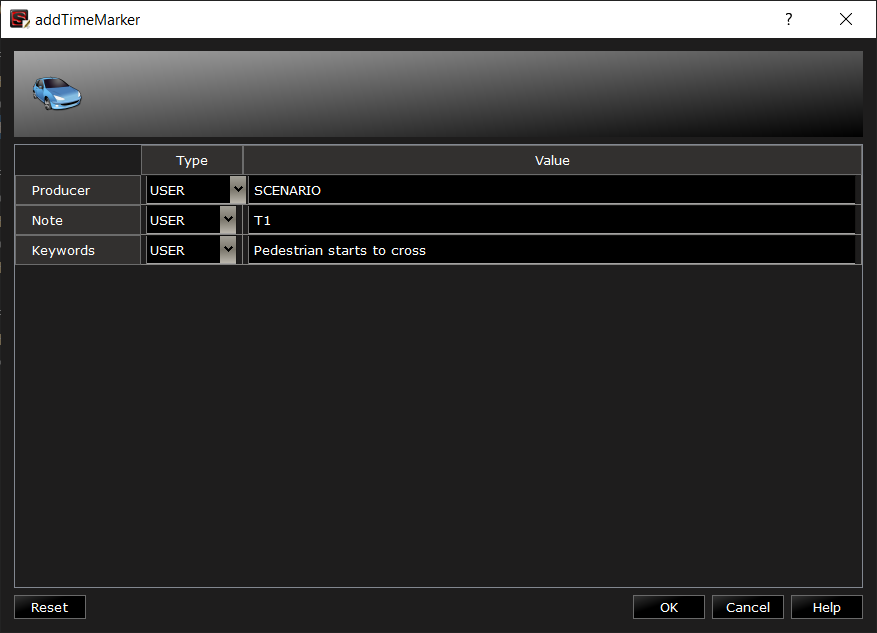
-
You finished your first rule, now let’s create a second one.
-
With a right click on this new rule, add a
is >condition (Type:BECOMES TRUE). This condition will compare the functiongetBrakePedalwith0.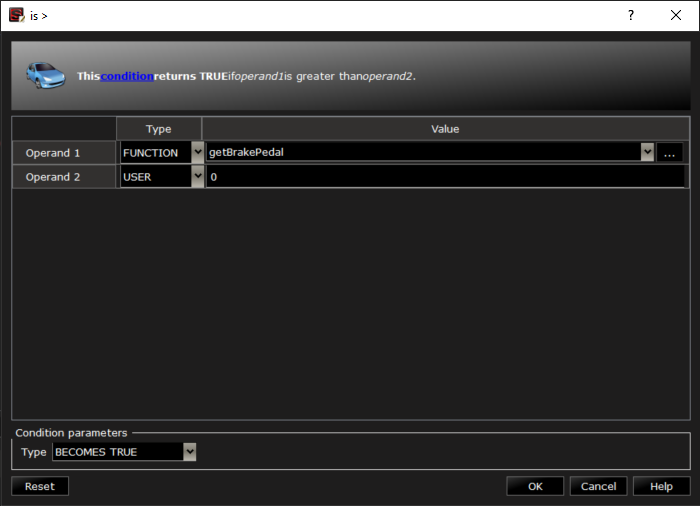
The
getBrakePedalfunction returns the force applied on the brake pedal (0 if released). -
Associate the
getBrakePedalfunction with the EGO vehicle.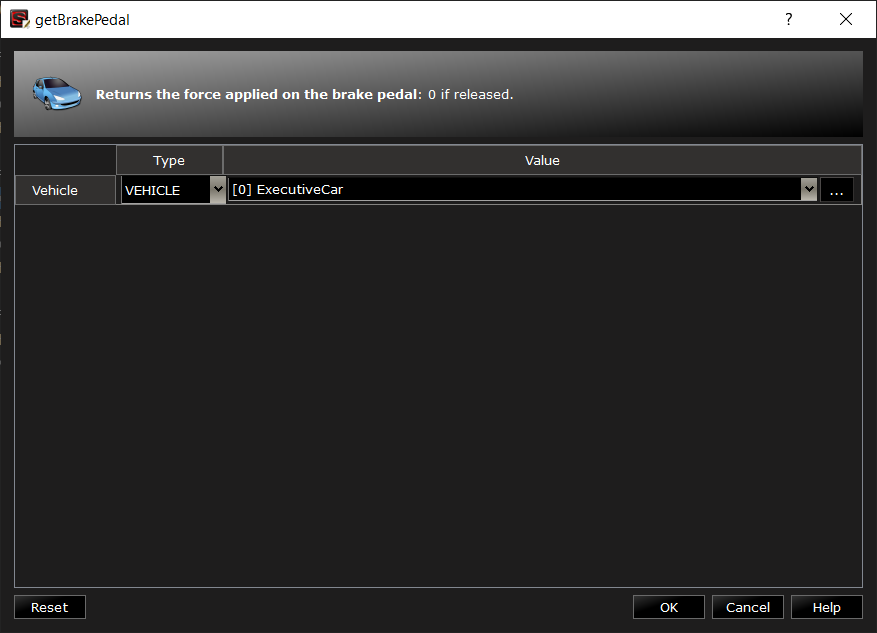
-
Once the condition finished, repeat the steps 5 and 6 for your second variable
t2. -
You now have your two variables set, you just need to send the time difference (
t2-t1) to anexportChannel. To do this, create a final rule with aisTruecondition.Note: A
isTruecondition always returns TRUE. -
Before adding an action, you must create a new
exportChannel. To do this, click onCONFIGURATIONabove the toolbar and open theExport channel Manager. With the green +, you can add a newexportChannel.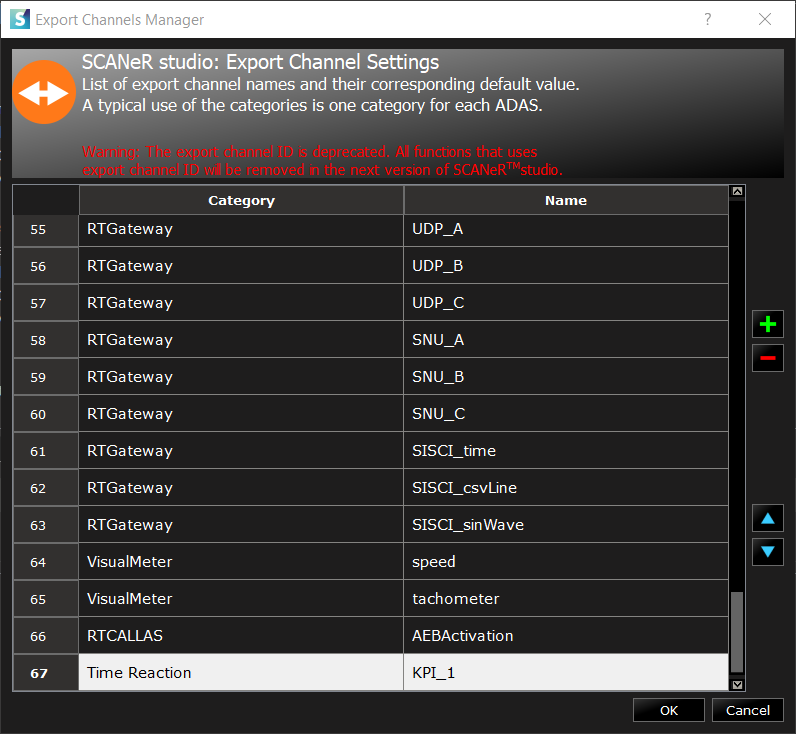
Note: Don’t forget to add a Category and a Name.
-
Now it’s time to add a THEN action in which we will use the
setExportChannelByNameaction and theexportChannelyou just create.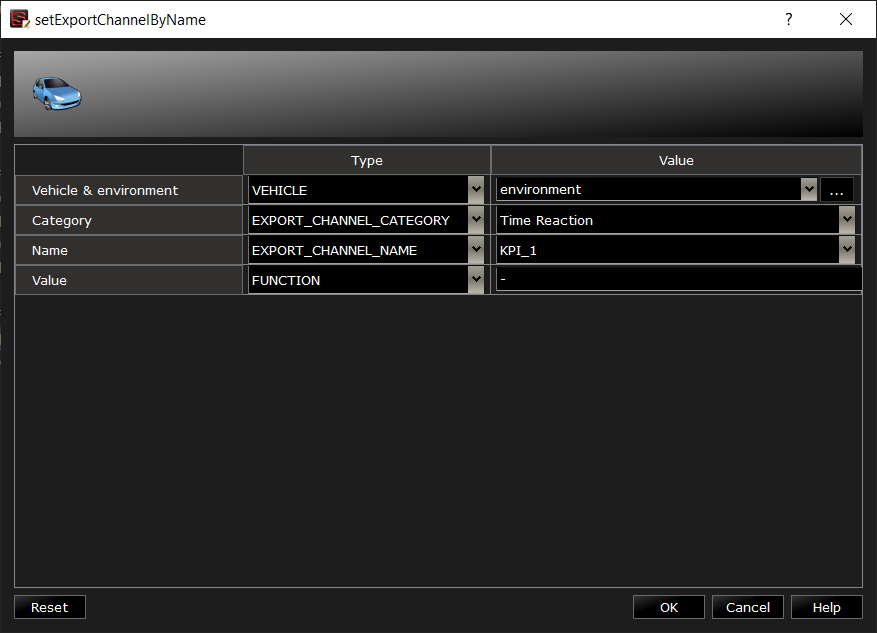
This action is used to exchange data (one float value per channel) on the SCANeR network.
The Value here uses the
-(minus) function to subtract the two variables.
We are done with the script, we just calculate the time between the moment when the driver brakes and the pedestrian crosses and send it to an exportChannel.
At the end, the script should look like this:
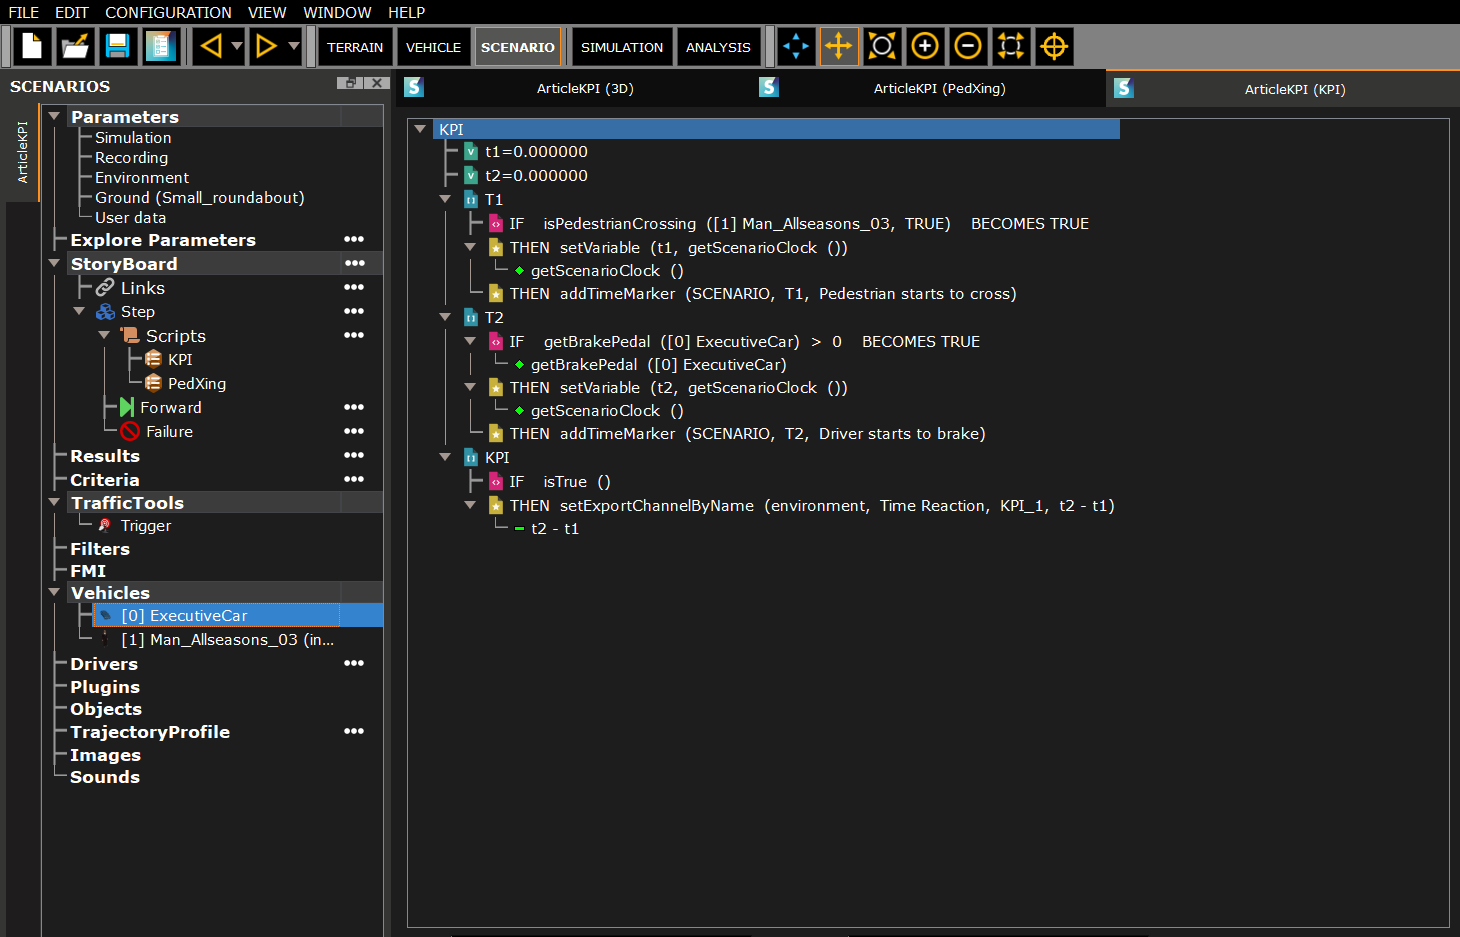
Note: You can rename the script and the rules to have a better understanding of it.
Step 2. Record your simulation
Congratulation, you have finished your scenario! It is time to run it, but before you do, make sure you start all the modules you need.
You will need the ACQUISITION and MODELHANDLER modules to drive the vehicle, SCENARIO to read the scripts, VISUAL to find your way in the scene, WALKERTRAFFIC to activate the pedestrian’s artificial intelligence, and last but not least, the RECORD module. The RECORD module is used to record all the simulation data such as the SCANeR network messages, where you can find your exportChannel. If the RECORD module is not activated, it will be impossible to analyze the data later.

You can now run the simulation. Be sure to brake in time! ![]()
Step 3. Access KPI data
Once your simulation is complete, you will need to go in the ANALYSIS mode and and open the corresponding simulation.
Here you can find the replay data of your simulation, your time markers and the graph containing the values of your exportChannel.
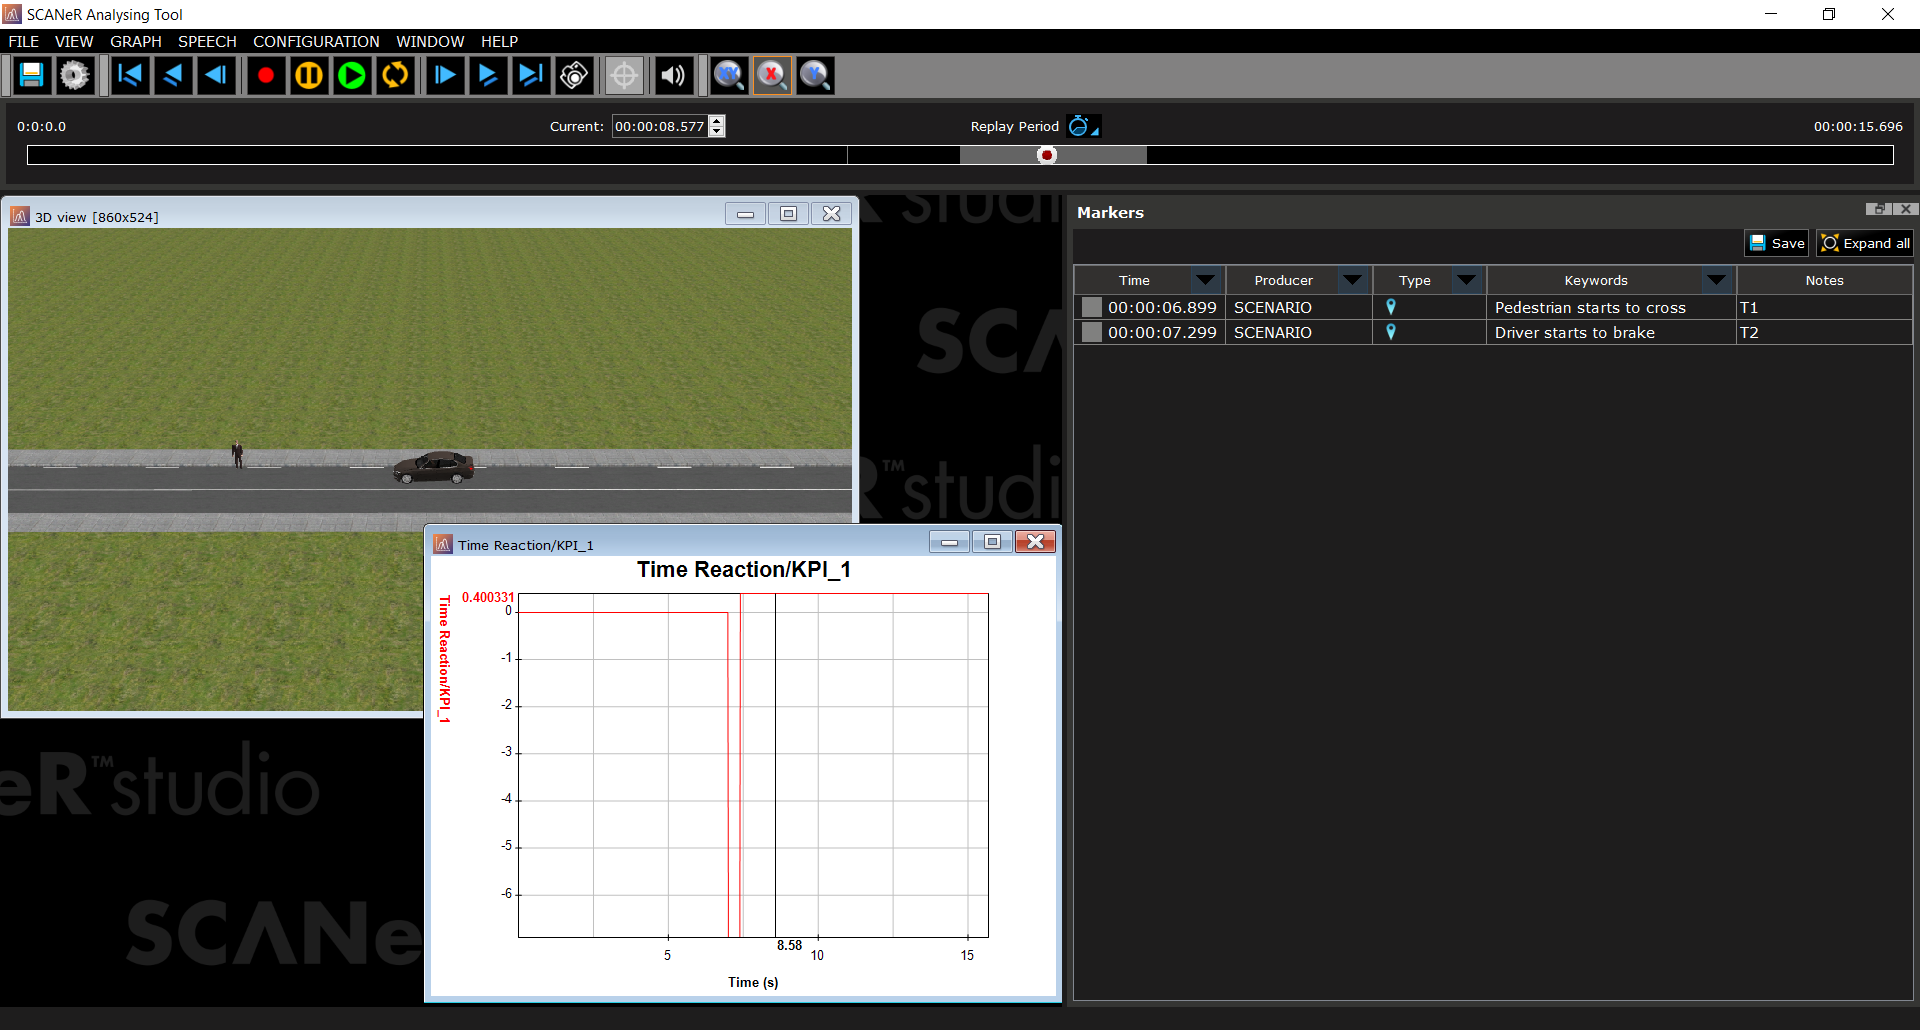
To display the graph, go to GRAPH > New graph... and select your graph under Environment > ExportChannel.
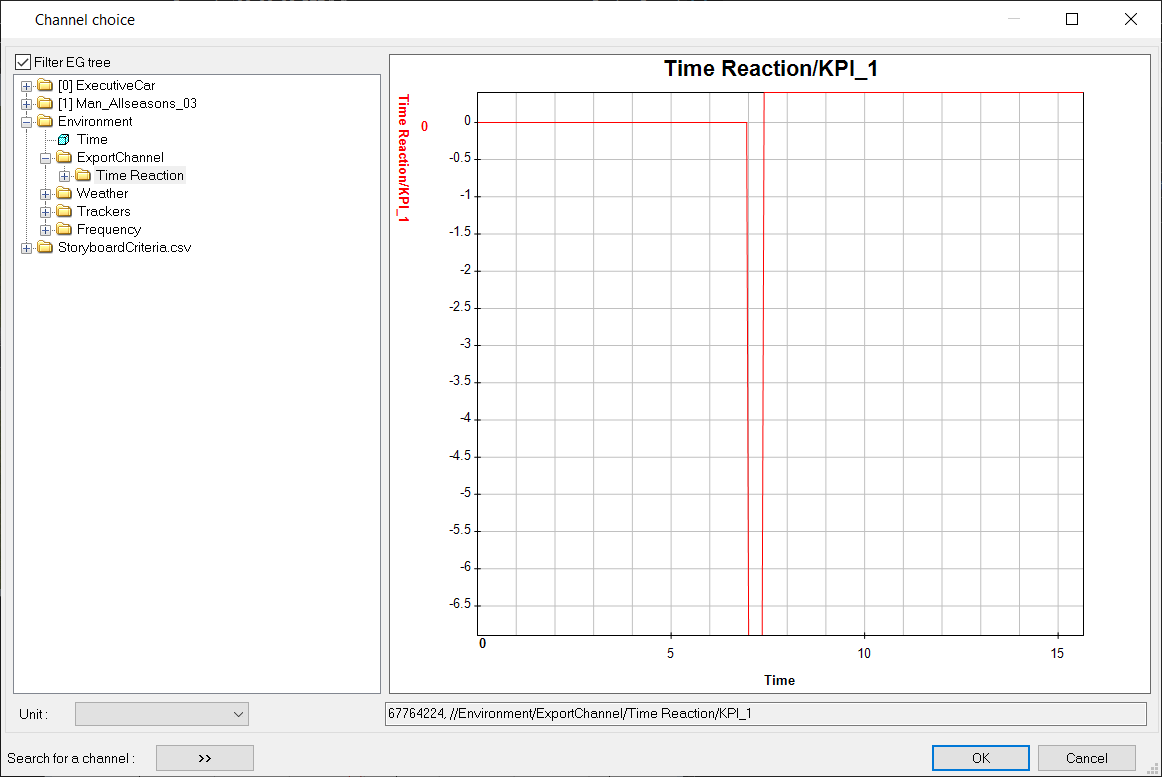
Note: If the graph is not displayed, check behind the time markers.
Note: Once your graph is displayed, you can export its value into a CSV file. To do this, go to
GRAPH>Current graph>Export to csv...
To come back to our example, the driver’s reaction time to brake when a pedestrian crosses the road is the value available after the T2 time marker.
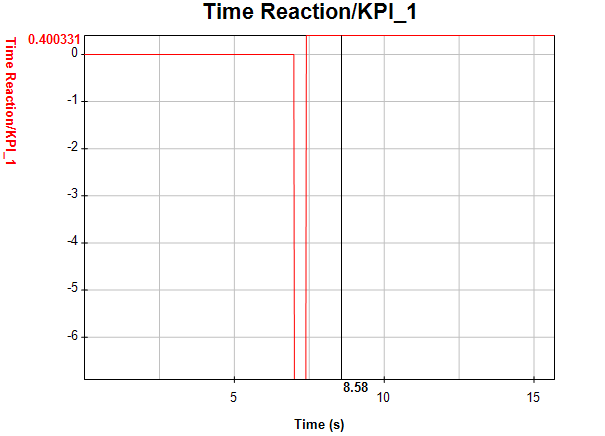
Here, the driver brakes after 0.400331s.
Conclusion
To sum up, thanks to the SCENARIO mode and the scripts, you can define your KPI and send it to an exportChannel. This will allow you, if the RECORD module is running during the simulation, to analyze your KPI in the ANALYSIS mode.
I hope you enjoyed this tutorial! If you like this kind of content, check out our SCANER SOFTWARE RESOURCES for more. ![]()
You’ve made it to the end of SCANeR User Guides.
We thank you very much for your interest in our products!
To go even further, head back to the main page and check out our SCANeR Samples Pack chapter 😊
![]() This way
This way