How to configure driver’s inputs
SCANeR can be deployed on many different platforms (workstation, driving simulator, cloud, etc.) and can be used with autonomous driving as well as with a human driver in the loop. Having an accurate acquisition of the driver’s inputs is very important in order to have a more immersive driving experience.
This guide will explain how to configure driver input in SCANeR.
- Step 1. Add the driver’s acquisition module to your SCANeR workspace
- Step 2. Select the correct configuration file
- Step 3. Modify the mapping
- Step 3.1 Steering wheel
- Step 3.2 Pedals
- Step 3.3 Gearbox
- Step 4. Test the new mapping
Step 1. Add the driver’s acquisition module to your SCANeR workspace
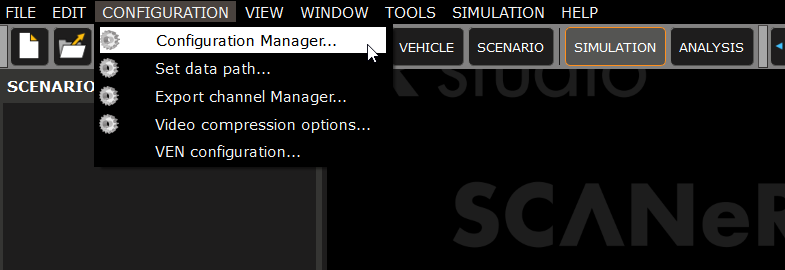
1.1 Open SCANeR on your system and go to CONFIGURATION/Configuration Manager....
1.2 Check that the configuration contains the Acquisition module. You can skip step 1.3 if it contains the Acquisition module.
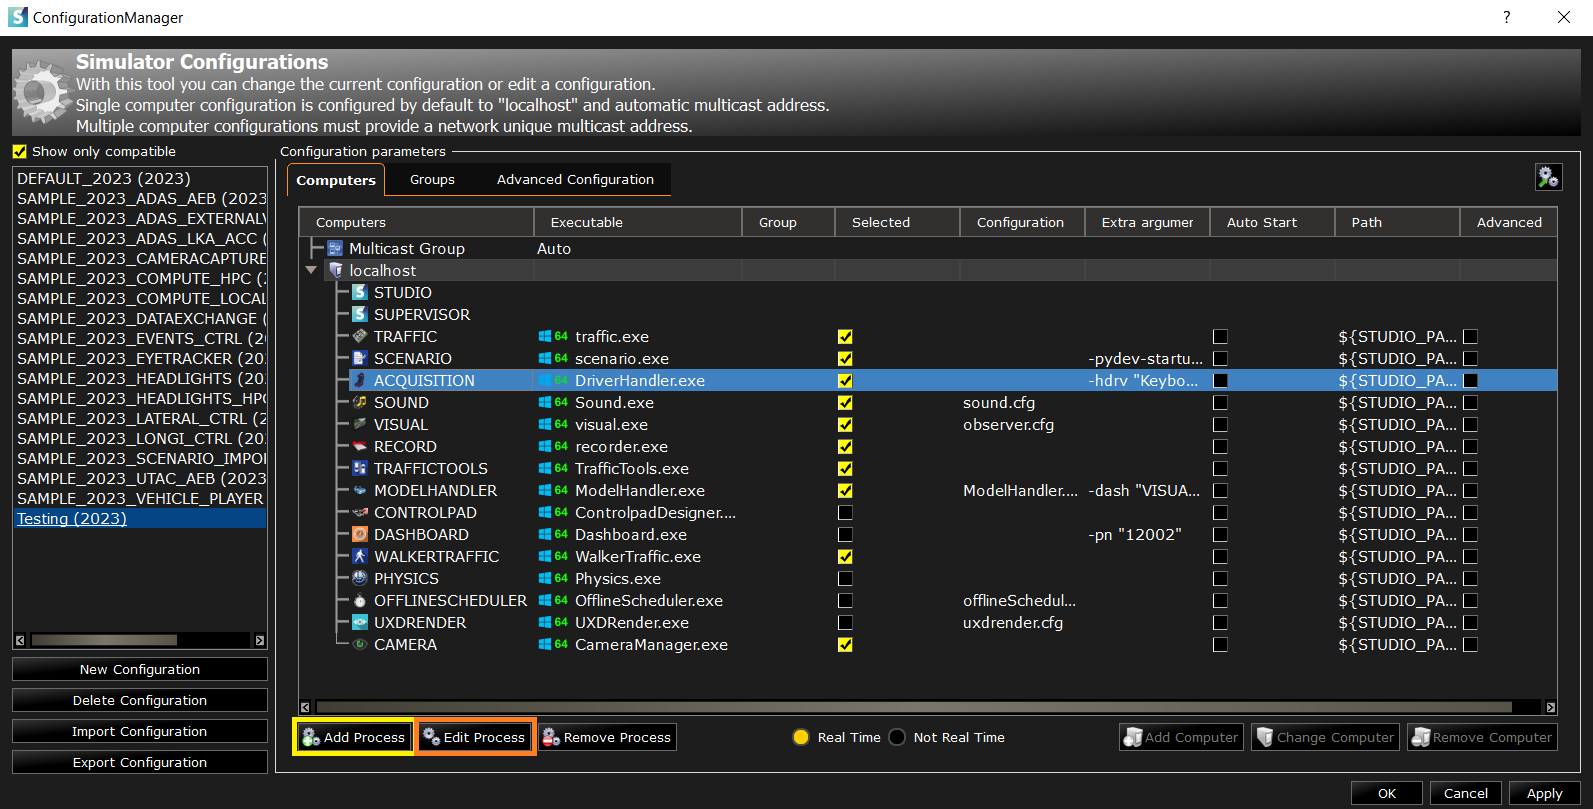
Acquisition is the generic name for the module that will be used to drive the interactive vehicle, though the .exe is named DriverHandler
1.3 Add the Acquisition module to your SCANeR Workspace.
- Click on
Add Process(seen above in yellow), selectDRIVERHANDLERmodule from theProcess Editorlist, click onAddandClose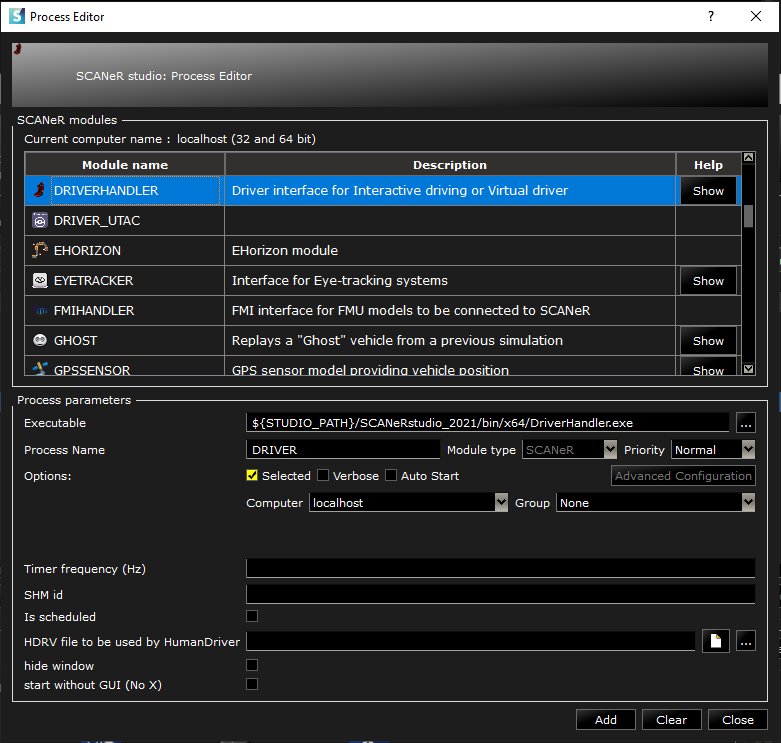
You have now the Acquisition module in your configuration ! 💪
Let’s move on to step 2.
Step 2. Driver acquisition configuration file
AVSimulation provides several driver acquisition configuration files. These are preconfigured in order to work with standard systems (Logitech, Fanatec, Sensodrive steering wheels, etc.). You can use these configuration files as they are or tune them to fit your needs.
-
In order to change the configuration file, go to
CONFIGURATION/Configuration Manager.... -
Select Acquisition module in your configuration and click on
Edit Process(seen in image from step 1.2 in orange). -
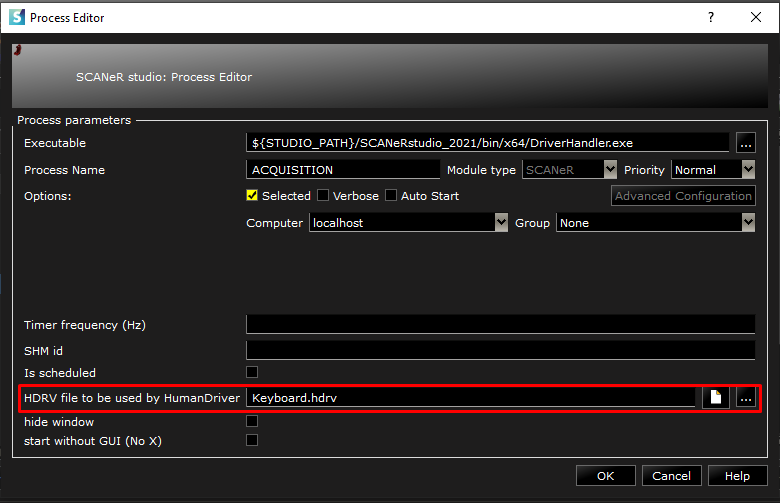
You can see a parameter
HDRV file to be used by HumanDriver- This parameter specifies the mapping file between the driver’s input and the driver’s command in SCANeR.
-
Click on
...to see the available files provided by AVSimulation. These configuration files are ready to use for standard systems.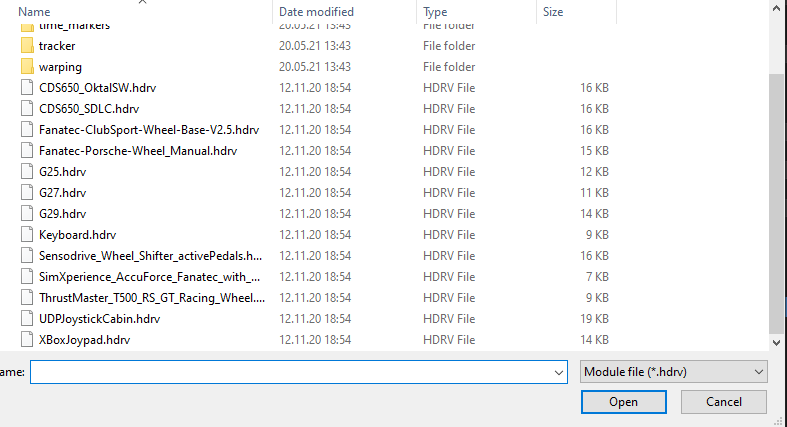
If your system is not on the list or if you want to customize the mapping, check out step 3!
AVSimulation can also help you to configure and tune your acquisition system 😀.
Step 3. Modify the mapping
In this step we will see how to modify the mappings for the most common driver inputs (Steering wheel, Pedals and Gearbox).
-
In the Process Editor, click on the file icon next to .hdrv file name.

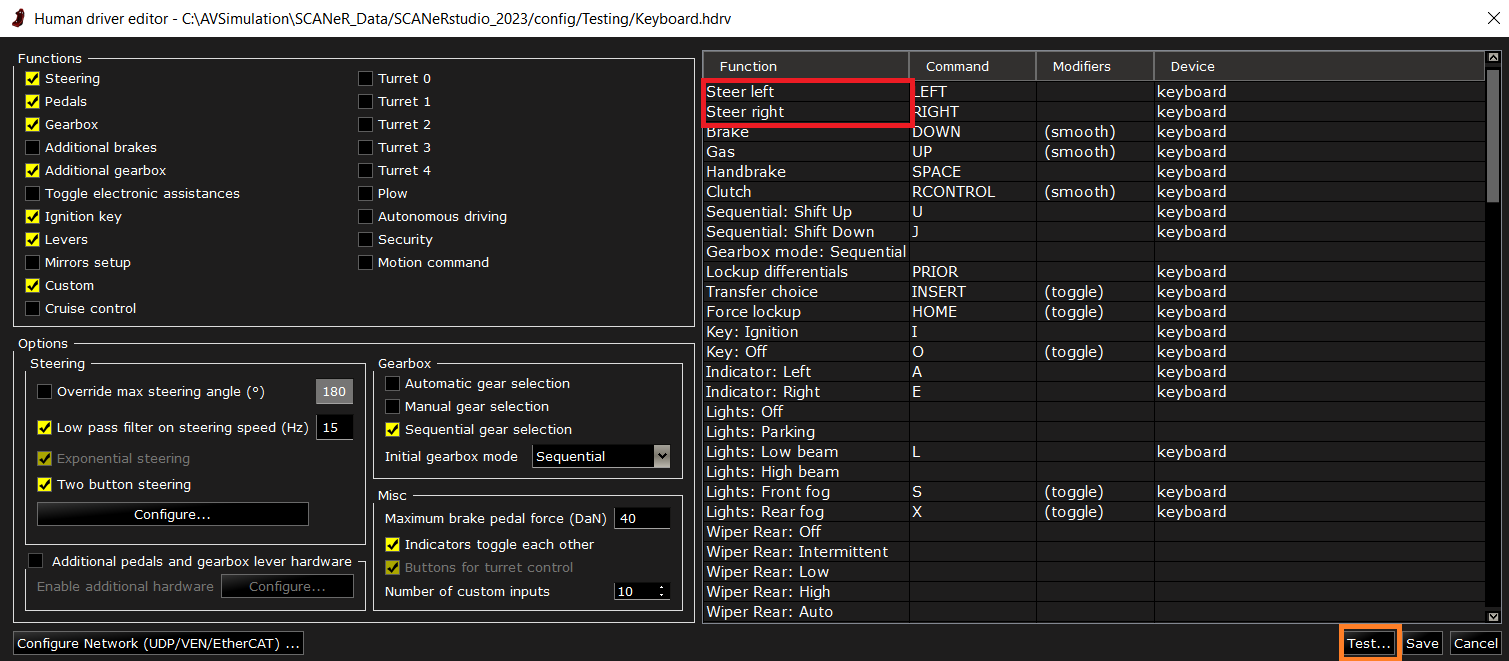
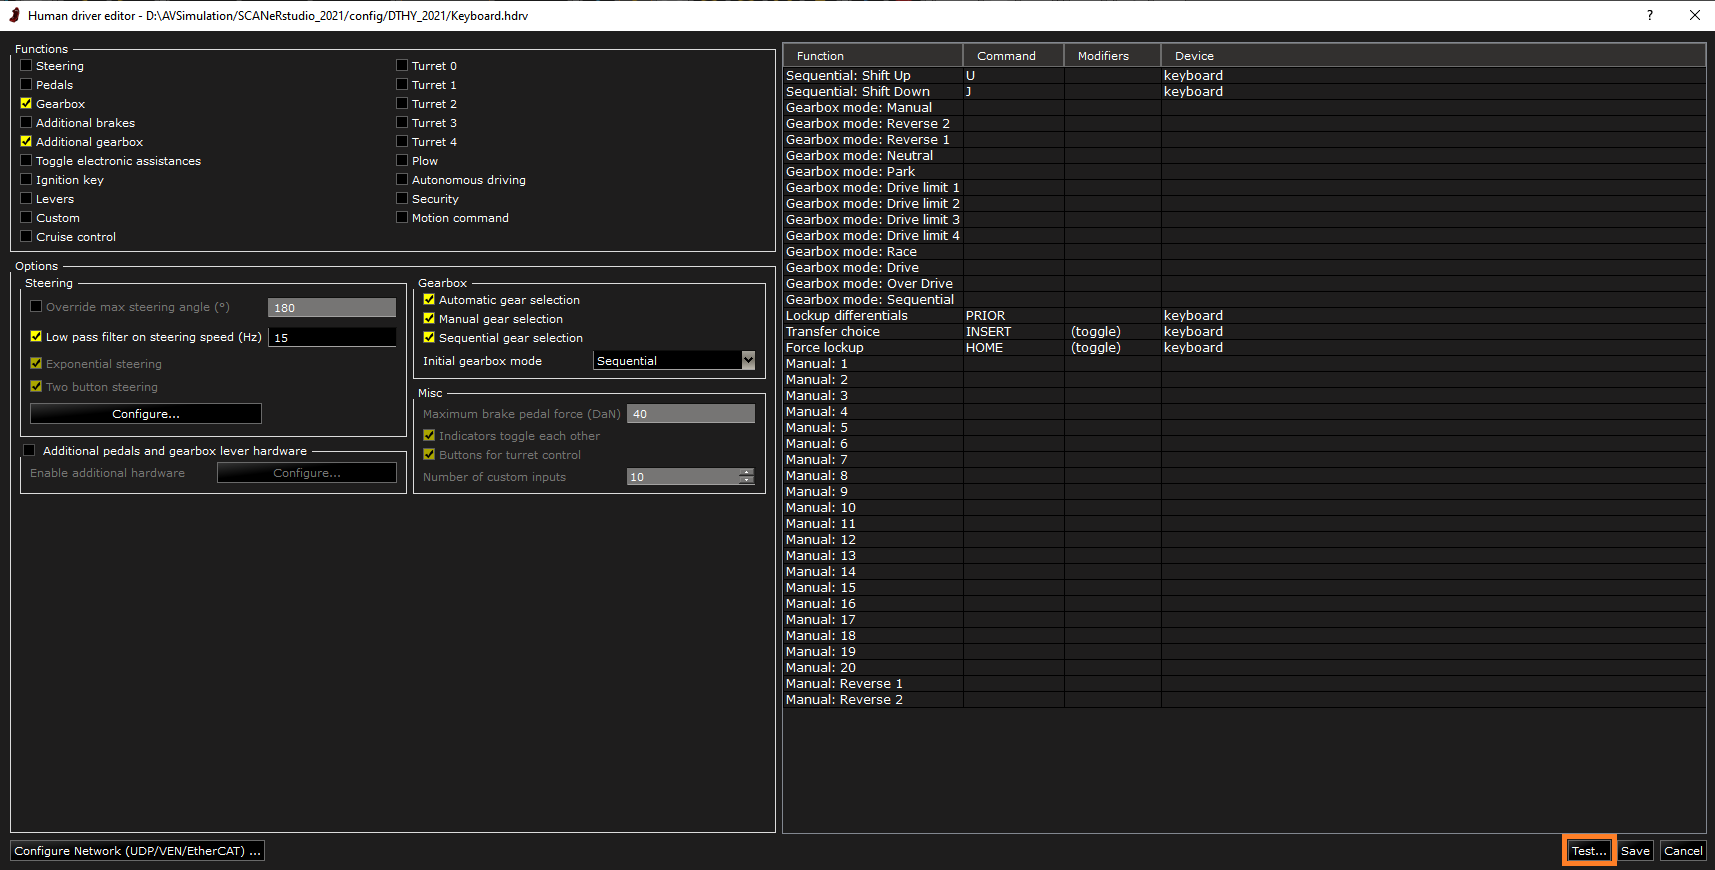
- In the Human driver editor there are four differents areas.
- Functions group in the upper left - This area is used to select the main driving functions (such as steering, pedals, ignition key…) that will be controlled by the HumanDriver. The functions that are not checked can be used by another acquisition module.
- Function mapping on the right - This area is a table containing the mapping of each function of the SCANeR vehicle to a command from a hardware system.
- Options in the middle left - This area will enable more active controls for the operator to choose more parameters related to the selected function.
- Configure network in the lower left corner - It is also possible to retrieve acquisition through UDP, VEN or EtherCAT Communication.
- Modify the mapping.
Step 3.1. Steering wheel
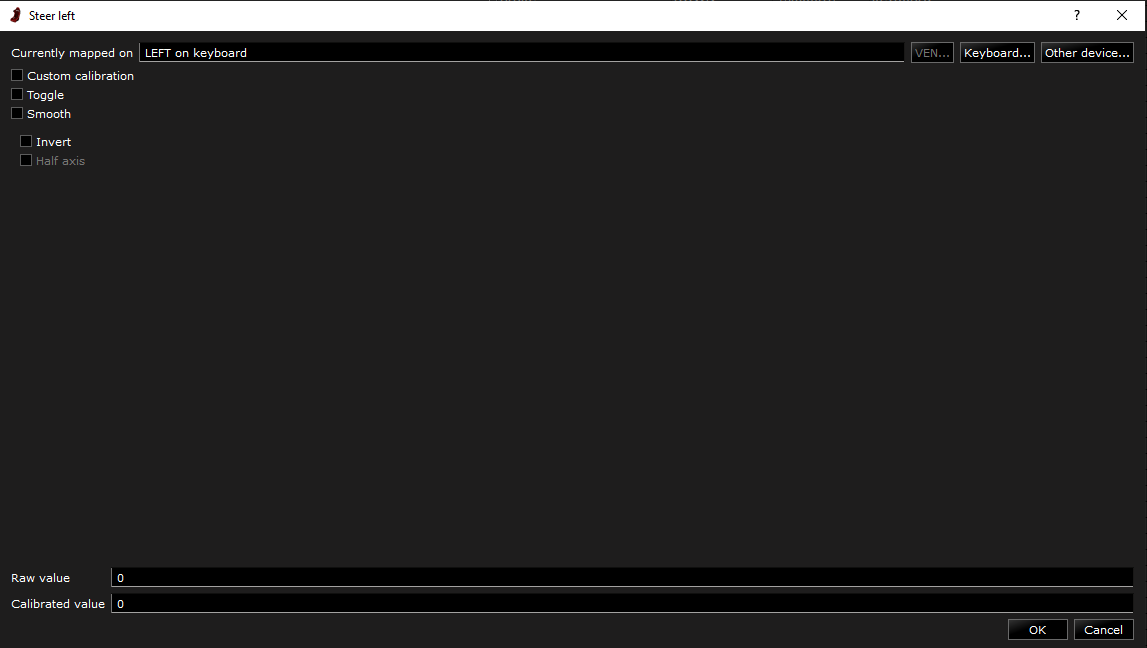
There are 2 functions for steering (Steer left and Steer right).
To change the mapping, double click on Steer left or Steer right (seen above in red), then click on other device... or Keyboard and press the key you want to use to steer left
Step 3.2. Pedals
You can repeat the above step for Pedal functions (Brake, Gas, Handbrake and Clutch).
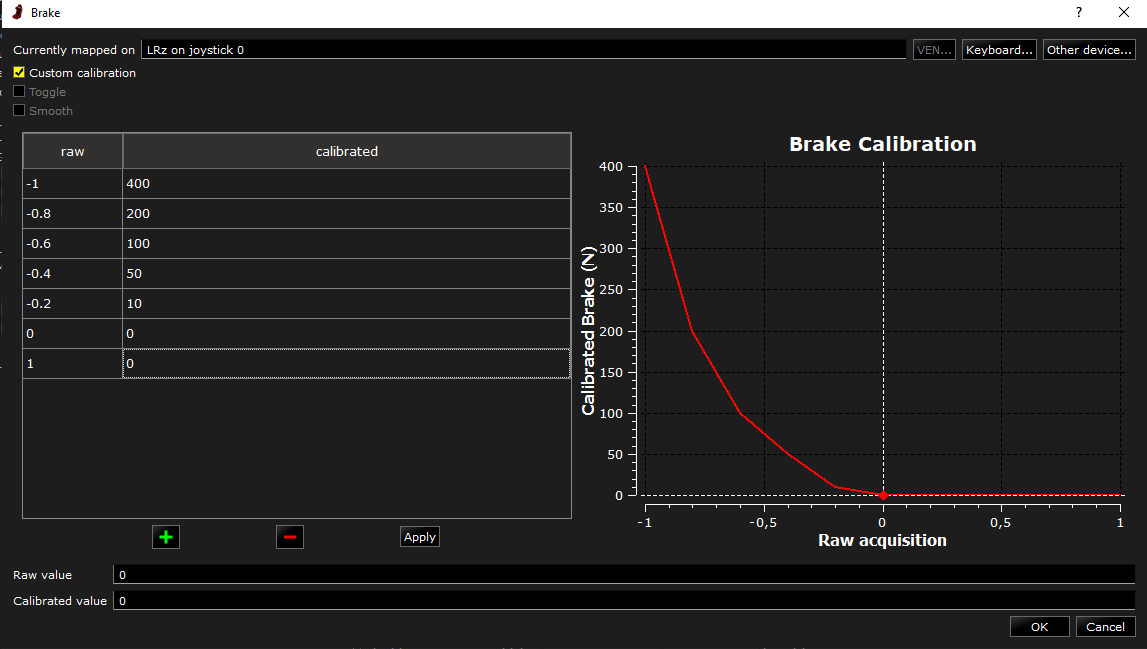
For Brake, Gas and Clutch, it is possible to use the
smoothoption to have a value that changes smoothly from 0 to 1.Custom calibrationcan be used to use a custom curve to create a non linear mapping between the command and the input. Good calibration means better feeling and immersion for the driver.
Step 3.3. Gearbox
In SCANeR you can choose whether to drive an antomatic gearbox, manual gearbox or sequential gearbox in the Options area. Once you have chosen, you can map buttons in the Function mapping area to change the mode (e.g. Switch between Automatic and Manual) or to change the gearbox status (e.g. from Drive to Park for an automatic gearbox).
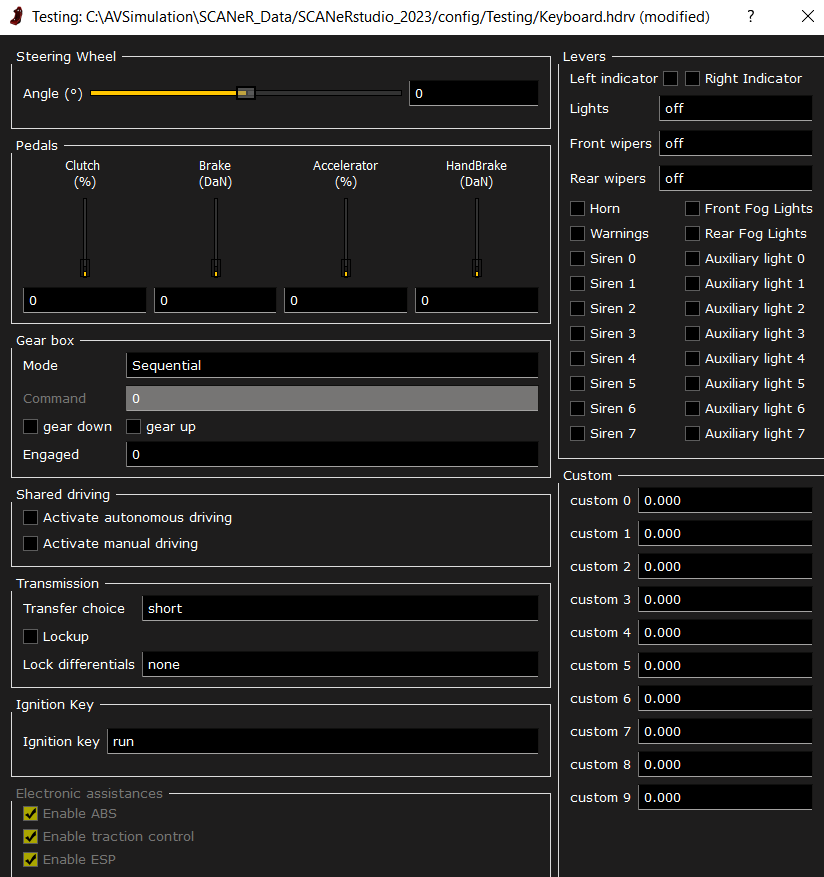
Step 4. Test the new mapping
Before finishing, you can test the new mapping by clicking on Test...(seen above in orange) in the bottom right of the Human driver editor window.
Once you are happy with the settings, click on Save.
Congrats! Have fun with your own steering wheel and pedal configuration! 🚗