SAMPLE_VEHICLE_PLAYER
This is a description and user manual of the sample included in the Samples Pack.
See also: SAMPLE_SCENARIO_IMPORTER.
Contents:
- Goal of the sample.
- How to use the sample.
- Explanation to make the sample your own.
- Go further in case you need more.
Goal
“Vehicle Player” is a feature of SCANeR that allows a simulated vehicle to follow exactly a recorded trajectory.
In the User Manual:
5.5.10. Player model.
Vehicle Player uses its own data format. Data acquired from measurements or third-party software must be converted.
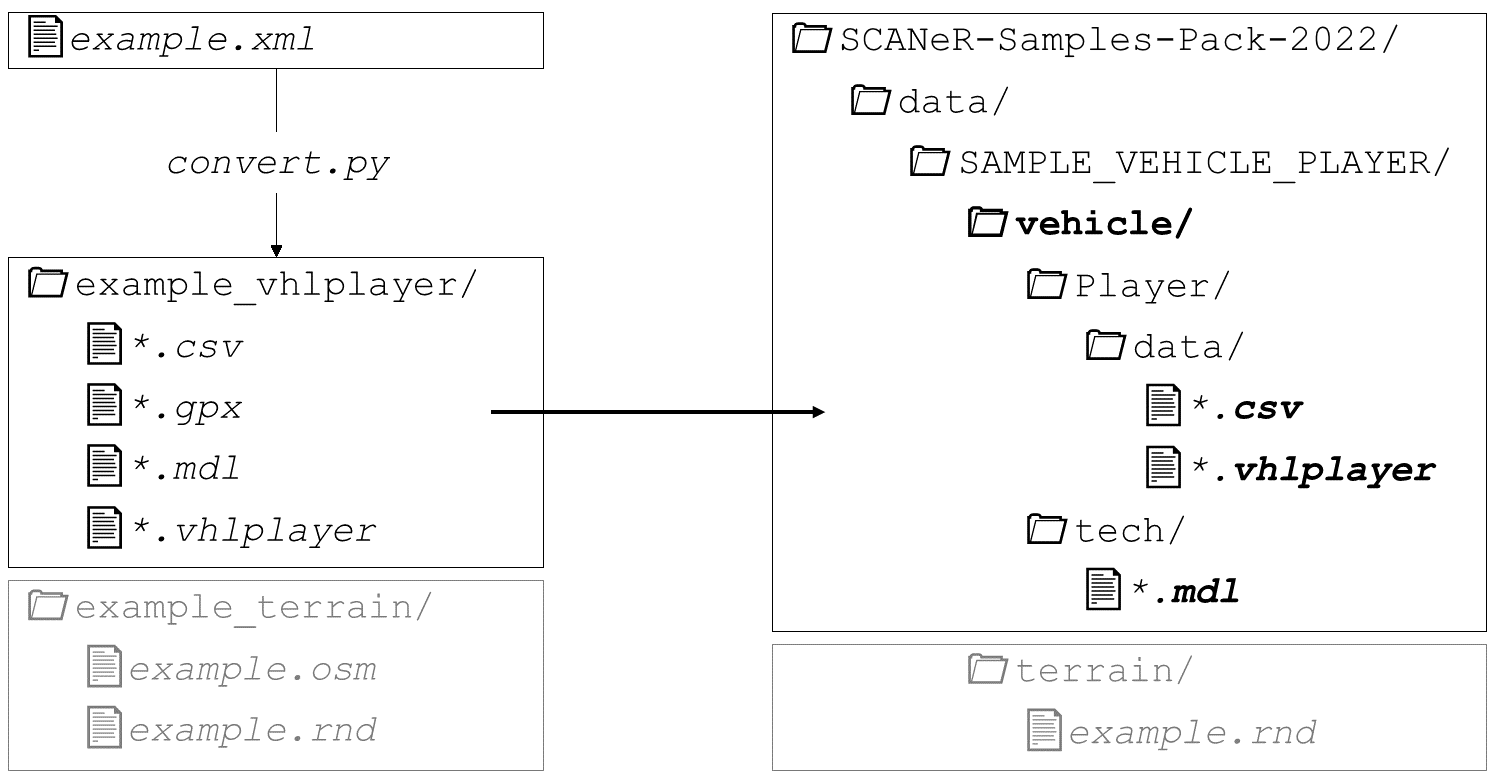
📄 Source data file → 📄📄📄 SCANeR Vehicle Player files
The source data contains the position of one or several vehicles over time.
The positions should be in the cartesian referential. Although it is possible to convert from geodesic to cartesian, as shown here.
This sample shows how to convert the source data using a Python script. The input format is XML, but the script can be adapted to take other formats as an input.
How to use
Pre-requisites:
Step 1. Convert the vehicle trajectory data
The source data is in geodesic referential (lat, long). Let’s convert it to cartesian (x, y).
-
Move to the workspace folder
SCANeR-Samples-Pack-2022\APIs\samples\VehiclePlayer\ConvertFromXML.- The file
example.xmlcontains test data exported from the third-party software PreScan. - The script
convert.pycan read, transform and save the data in the format of Vehicle Player. - The folder
template/is a dependency of the script.
- The file
-
In a console (cmd), call the script
Python convert.py example.xmlOutput files are in
example_vhlplayer/.
Step 2. Use the vehicle trajectory data
-
Place the converted files in the SCANeR data hierarchy.
-
In SCANeR studio, load the configuration SAMPLE_2022_VEHICLE_PLAYER (how?).
 Just to be sure, refresh the file index with
 menu TOOLS > Update resources. -
Create a new scenario
menu FILE > New ScenarioUse the provided terrain
examplein the list. -
In the RESOURCES panel, look for the converted vehicle
hostvehicle.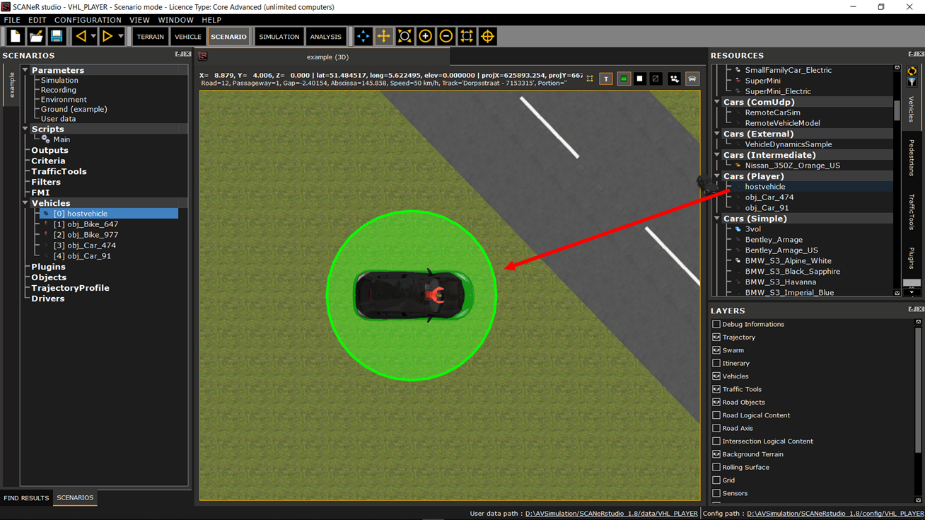
-
Start the simulation
The vehicle moves according to the input data.
The error below may appear in the log.
They are the result of a known bug, but they do not prevent correct simulation.ERROR 1: Missing BASEGEODCRS / BASEGEOGCRS / GEOGCS node ERROR 1: PROJ: proj_create: unrecognized format / unknown name ERROR 6: Cannot find coordinate operations from `' to `EPSG:4326' ERROR 1: PROJ: proj_create: unrecognized format / unknown name ERROR 6: Cannot find coordinate operations from `EPSG:4326' to `'You can ignore those.
Explanation
Projection System
The source coordinates are in geodesic referential (lat, long). A projection allows to get them in cartesian referential (x, y).

The projection system depends on the region. In the script, the lines below must be changed according to your data location:
#Projections
inProj=Proj(proj='latlong',datum='WGS84')
outProj=Proj(init='epsg:28992', towgs84='565.417,50.3319,465.552,-0.398957,0.343988,-1.8774,4.0725')
offsetX = 171338.11
offsetY = 388410.20
“EPSG” and “TOWGS84” codes can be found on epsg.io.
Terrain
Both files under example_terrain/ contains the road network associated to the imported data.
-
example.osmis the source data. -
example.rndis the SCANeR Terrain after import ofexample.osmin the Terrain editor.
Go further
Multiple Vehicle Player instances
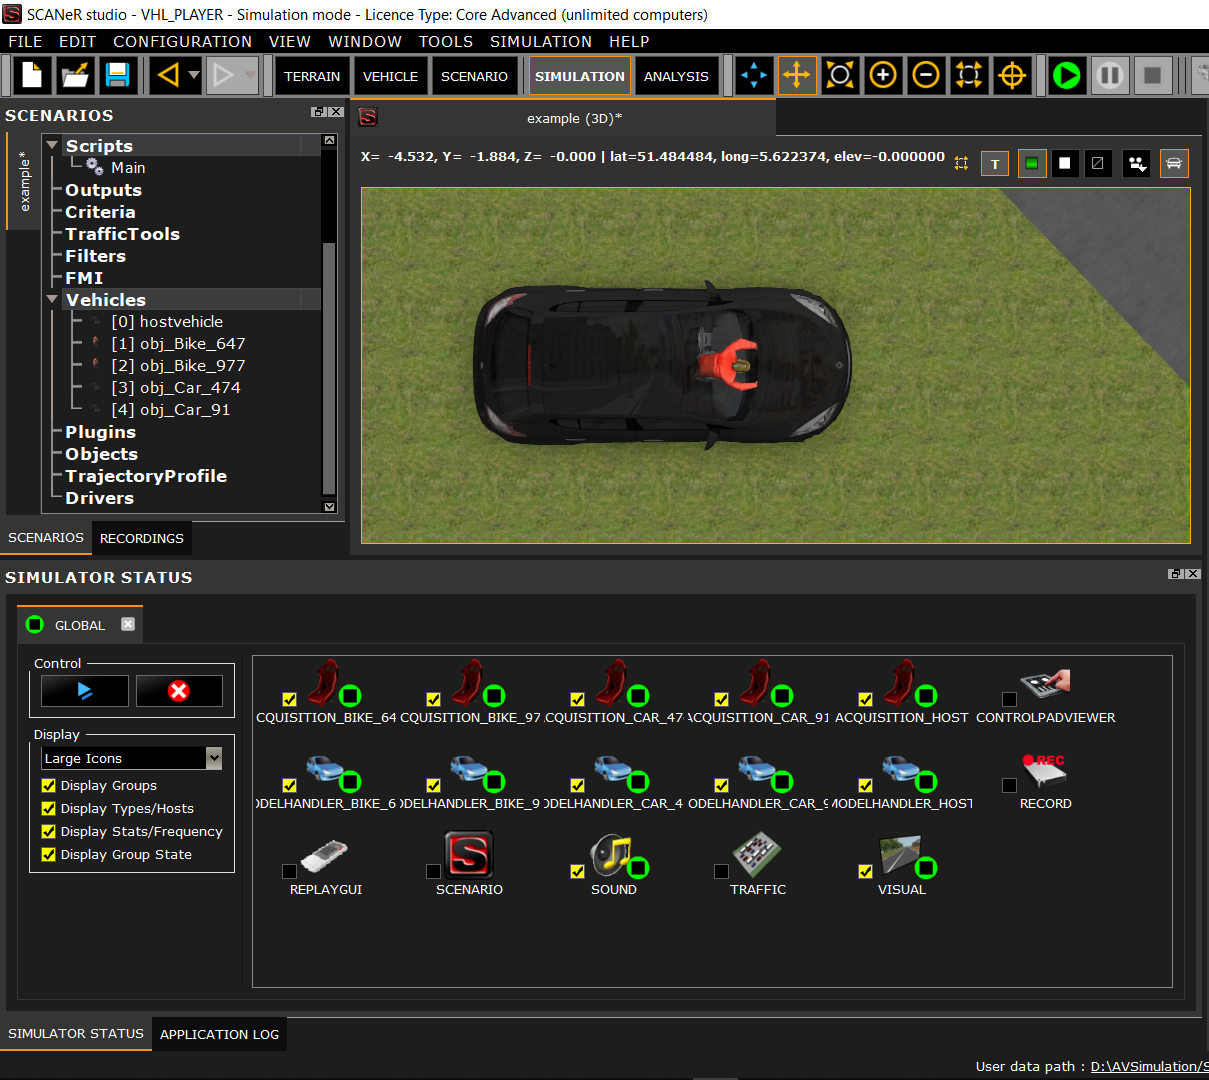
It is possible to import several vehicle trajectories. For example, if there is more than one vehicle trajectory in the input XML, the conversion script will produce several vehicle files. Once drag & dropped into your scenario, you’ll have them in the hierarchy.
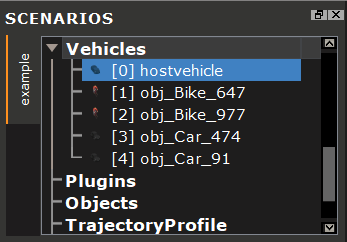
Each vehicle will need its own ACQUISITION and MODELHANDLER modules.
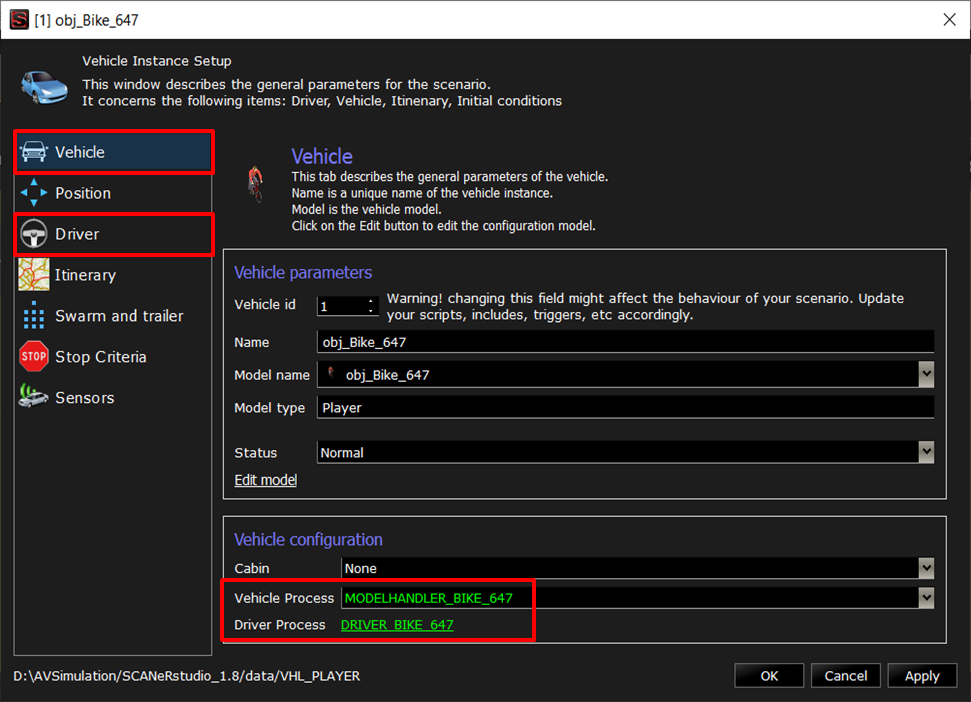
Finally, each vehicle instance can be linked to its dedicated modules in the Vehicle Instance Setup window.
Vehicle > Vehicle ProcessDriver > Driver Process
Replay GUI
The Replay GUI is a SCANeR module that helps the use of Vehicle Player.
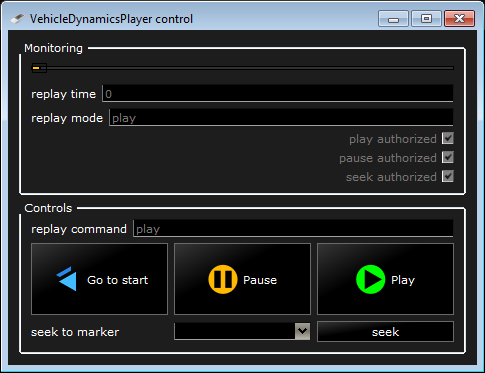
In the User Manual:
7.13. ReplayGUI.